
For many years, starting an online store was a costly and complicated process — and essentially something that could only be done by big businesses. But today, that’s no longer the case. Thanks to the emergence of a multitude of user-friendly ecommerce platforms, starting your own ecommerce business has never been easier.
So, in this guide, I’ll walk you through how to start an online store — step by step. I’ll keep things jargon-free, beginner-friendly and totally doable.
Let’s dive in.

1. Do your market research
Before you start building your online store, you need to make sure there’s actually demand for what you’re going to sell on it.
This means identifying a profitable niche — one where there’s a lot of interest in the kind of things you’re selling, but not so much competition from other sellers that your products won’t get noticed.
Here are some tools that can help you find a niche:
- Keyword research tools like Ahrefs and Semrush — these let you see how many people search for particular products each month (and how hard it will be to rank highly in search results for queries relating to those products)
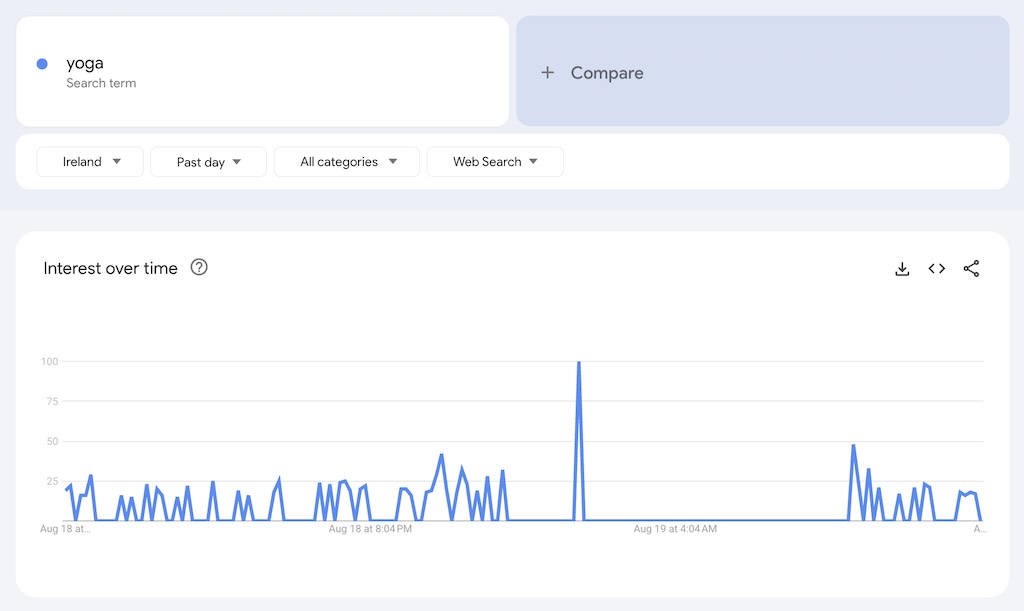
- Trend identification tools like Google Trends, Exploding Topics / Buzzsumo / SparkToro — these let you identify rising product trends and hot topics online.
- Ad platforms like Google Ads, Facebook Ads, and TikTok Ads — these provide insights into product demand based on real advertising data.
2. Pick an ecommerce platform
Next, you’ll need to decide on the software that powers your store. There are plenty of great ecommerce platforms out there — each with their own pros and cons.
But for beginners, Shopify tends to be the best all-rounder. It’s affordable, easy to use, and gives you everything you need to start selling — whether you’re offering physical products, digital downloads or print-on-demand items.

So in what follows, I’m going to use Shopify as the example platform for building an online store with.
🛠️ Using a different store builder? No problem — most of the steps below will still broadly apply.

3. Choose your fulfillment method
There are several ways to fulfill orders — and the right option for you will depend on the kind of products you’re selling.
Here are a few key fulfillment methods to consider:
- Selling your own inventory
This is where you buy or make your own products, store them yourself and ship them out after purchases of them are made on your store. - Dropshipping
Dropshipping is a business model where you don’t manufacture, purchase, store or deliver your products. Instead, you take orders for products via your online store and pass them onto a third-party supplier. The supplier then charges you, and sends the goods to your customer. - Print on demand (POD)
Print on demand is a selling method where you add your own designs to items like t-shirts, mugs or posters and sell them online. The key thing however is that a service prints and ships them on your behalf — but only after your customers have placed orders for them. - Selling digital products
This is where you sell downloadable goods like ebooks, music, photos, or software.
Now, in what follows I’m essentially going to focus on how to sell your own physical products. But most of the steps below apply to the other fulfillment methods too.
4. Prepare your online store’s assets
Before you start building your site, it’s a good idea to have the following assets to hand:
- A business name
- A logo
- Brand fonts and color scheme
- Product photos
- Product descriptions
- Page content (for your About, FAQ, Contact sections etc.)
Having these to hand will help you build your store more quickly — and give it a more professional feel.
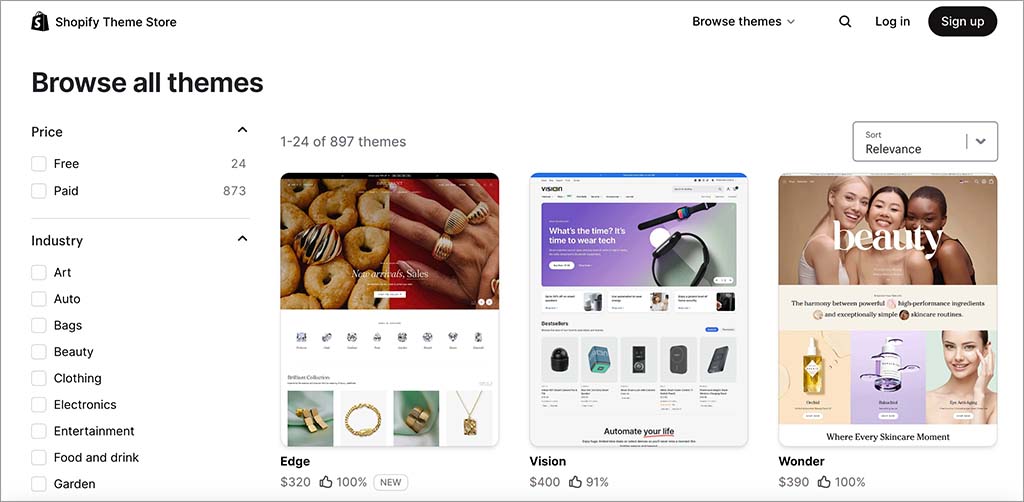
5. Choose a store theme
Themes control the look and feel of your store. Shopify provides a wide range of free and paid themes that you can browse in its theme library.

To pick and install a theme:
- Go to Online Store > Themes in your Shopify dashboard
- Click ‘Visit Theme Store’
- Choose your preferred theme and install it
- Click ‘Customize’ to tweak fonts, colors and layout.
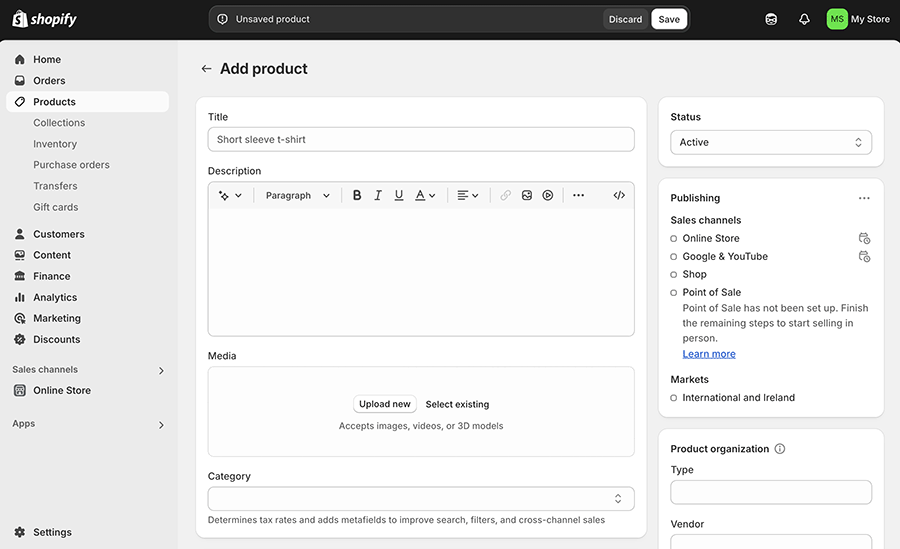
6. Add your products
To list a product, head to Products > Add Product and fill in key details like:
- Product title — the name of what you’re selling. This is what will be displayed in search results, so make sure you use titles that people are actually searching for (keyword research tools like Ahrefs and Semrush can help here).
- Description — a couple of paragraphs that highlights all the features of your products. Again, search engines will pay particular attention to this, so make sure it contains relevant keywords.
- Price
- Product images
7. Create product collections
Collections are groups of related products — like “road bikes,” “mountain bikes,” or “bike accessories.”
They help you:
- create category pages that make it easy for
- highlight products on your homepage
- run promotions on selected items
To create collections in Shopify, go to Products > Collections and click ‘Create collection’.
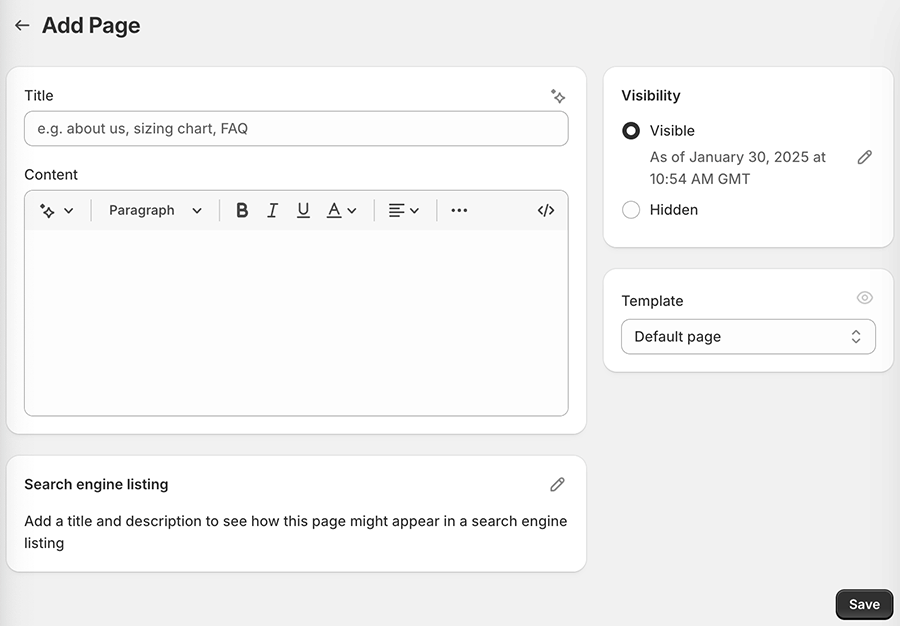
8. Add key pages to your site
Most stores need a few standard pages, including:
- Home page
- About us
- Frequently Asked Questions (FAQs)
- Refund policy
- Contact page
- Blog posts
How you create these in Shopify depends on the content type.
- For regular pages, go to to Online Store > Pages and click ‘Add page’
- To create your homepage, go to Online Store > Themes > Customize.
- To add blog content, go to Content > Blog Posts.
9. Set up your store navigation
A clear main menu helps customers navigate your site.
To set one up,
- Go to Content > Menus
- Click ‘Main Menu’
- Use ‘Add menu item’ to add links to your pages and collections
- Click Save.
Tip: you can also use this section to create a footer menu.
10. Set up shipping rates
At this point your store’s in pretty good shape — you’ve got your design, products and key content all sorted. Now you need to think about how much you’re going to charge your customers for shipping.
In Shopify, you do this by heading to to Settings > Shipping and Delivery, where you can configure:
- Flat rate shipping
- Free shipping
- Weight-based or price-based shipping
- Local pickup or delivery options
- Real-time carrier rates
Should you offer free shipping?
Free shipping can give you a great way to boost sales — it removes a key barrier at checkout and meets customer expectations shaped by online marketplaces like Amazon. It can also give you an edge on price comparison sites, where total cost (including shipping) matters.
That said, charging for shipping has its perks too. It helps protect your margins, especially on low-cost or bulky items, and can make pricing feel more transparent.
A smart compromise? Offer free shipping on orders over a certain amount — this encourages larger purchases while keeping costs under control.
11. Set up tax rules
Depending on your country of operation, and the type of products you’re selling, you may need to charge VAT or sales tax.
Shopify lets you configure this via Settings > Taxes and Duties
Tax laws can be complex, so it’s a good idea to consult an accountant about your tax setup.
12. Choose a payment gateway
To accept payments, you’ll need to connect your checkout to a payment gateway — software that processes credit card transactions.
Shopify works with over 100 payment gateways — and offers its own solution too, Shopify Payments. This is the easiest to set up, and it’s the only one that doesn’t involve transaction fees.
To enable a gateway:
- Go to Settings > Payments
- Pick a provider
- Follow the setup instructions
13. Connect your domain
Using a custom domain name (i.e., yoursitename.com) makes your store look more professional and credible — it tells visitors you’re running a real business, not a side project. It’s also easier to remember, better for sharing and can help build SEO authority over time.
When it comes to purchasing a domain, you can either:
- buy one directly from Shopify, or
- register one through a third-party provider like GoDaddy or Namecheap
To connect your domain, go to Settings > Domains and follow the on-screen instructions.
14. Prepare for launch
Before going live, double-check everything using a launch checklist. Here’s are the steps I normally take before publishing a Shopify store:
- Connect a custom domain — replace your default Shopify URL with a branded one to build trust and make your store more memorable.
- Verify product data — double-check titles, descriptions, images, pricing, tax, and shipping settings for accuracy.
- Review copy and visuals — proofread all text, check image quality and make sure everything looks good on all devices.
- Test all hyperlinks — ensure all internal and external links work correctly, especially after connecting your domain.
- Test payment processing — run through the checkout process to make sure payments, shipping, discounts, and taxes work properly.
- Check email notifications and forms — check that customer email notifications and forms are behaving as expected.
- Meet legal requirements and provide contact info — add your privacy policy, terms and conditions, and provide a way for customers to contact you.
- Remove unused apps — this speeds up your store and helps you avoid unnecessary costs.
- Enable two-factor authentication — protect your store by setting up multi-factor authentication on your Shopify account.
- Add a favicon — upload a small site icon to help reinforce your brand in browser tabs, bookmarks and search results.
- Optimize for SEO — add keywords, meta descriptions, and alt text to help your store get found in search results.
- Create a marketing plan — decide on how you’re going to promote your store across social, email, SEO, and paid channels.
15. Publish your online store
By default, new Shopify stores are password-protected — and you need to remove this password to publish your store.
To do this,
- Go to Online Store > Preferences
- Scroll to the ‘Password protection’ section
- Disable the password.
Congratulations — your store is now live!
Chris Singleton is the Founder and Director of Ecommercetrix.
Since graduating from Trinity College Dublin in 1999, Chris has advised many businesses on how to grow their operations via a strong online presence, and now he shares his experience and expertise through his articles on the Ecommercetrix website.
Chris started his career as a data analyst for Irish marketing company Precision Marketing Information; since then he has worked on digital projects for a wide range of well-known organizations including Cancer Research UK, Hackney Council, Data Ireland, and Prescription PR. He then went on to found the popular business apps review site Style Factory, followed by Ecommercetrix.
He is also the author of a book on SEO for beginners, Super Simple SEO.